[RPG MAKER MZ] How to Keep a Real-Time Gauge Always Visible on the Game Screen
[RPG MAKER MZ] How to Keep a Real-Time Gauge Always Visible on the Game Screen
Previous Post
In the previous post, we explored how to create a gauge that fills upward from the bottom.
Today, let’s take it a step further and learn how to keep that gauge always visible on the game screen. This way, players can easily track their progress at a glance, no matter where they are in the game. Shall we pin the gauge to the screen and make it a part of the user interface?
1. Creating a Common Event: Displaying the Gauge Image on the Screen
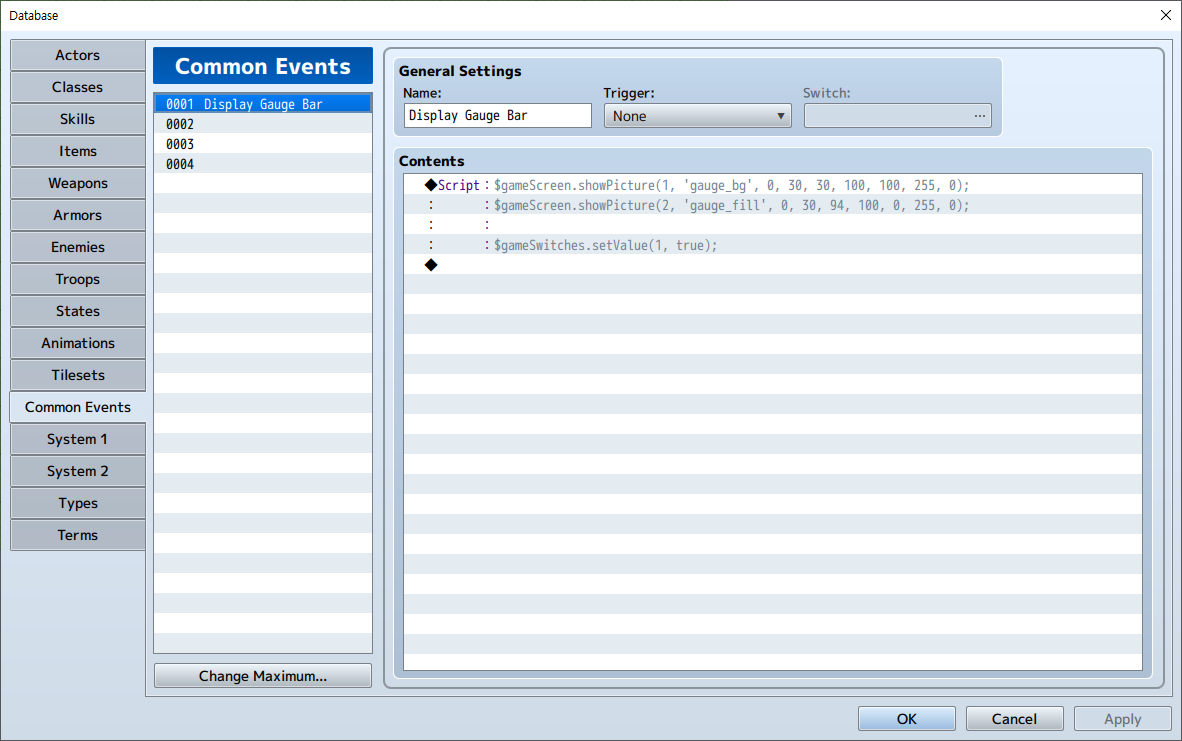
The first thing we need to do is create a Common Event that displays the gauge image on the game screen. This event will be set up to remain visible even when the player moves between maps.
Here’s how you can set it up:
Insert the same code we used last time to display the gauge images.
Then, add one more line to turn on a switch right below:
Replace n with the number of the switch you want to use.
We turn on the switch because it will be used in Step 3, where we’ll create another common event that updates the gauge in real time.
- true means the switch is turned ON
- false false would turn it OFF

2. Creating a Map Event: Auto-Running the Common Event
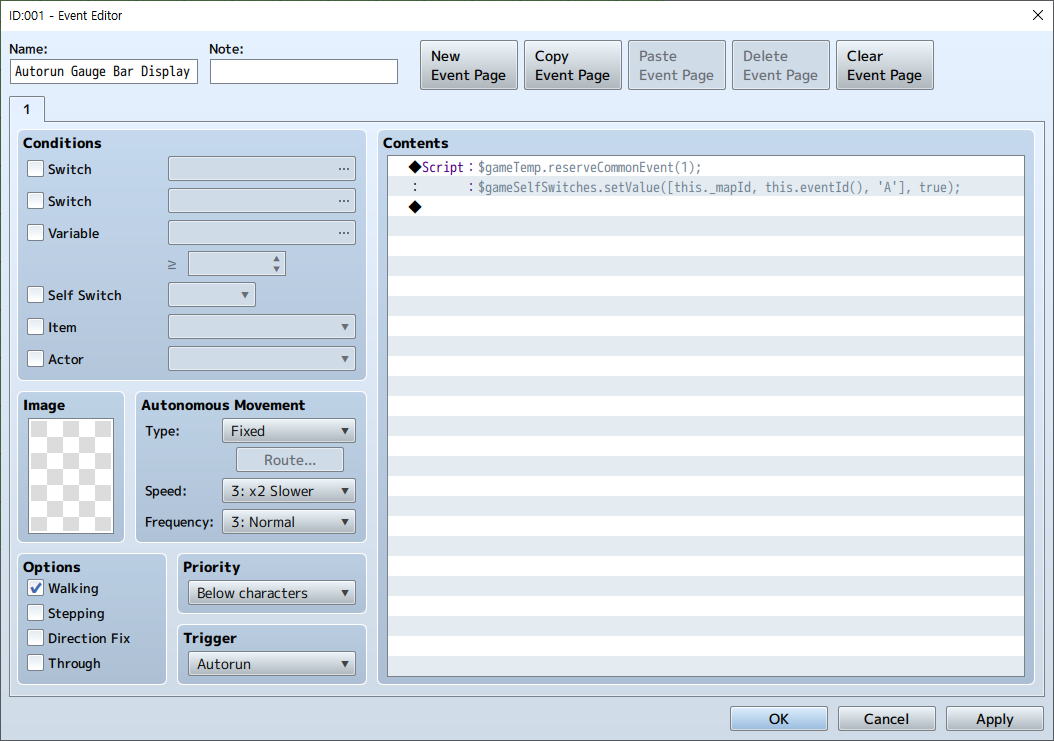
Next, let’s create a map event that automatically runs the common event we just made.
We’ll place a simple, invisible event on the map. Its job is very straightforward. Run the common event once, then quietly disable itself.
Write a script that runs a common event. Replace COMMON_EVENT_ID with the actual ID number of your gauge display common event. (e.g: Common Event ID 5 → reserveCommentEvent(5) )
After running the common event, we’ll turn Self Switch A ON so this map event doesn’t run again.
Let’s write the code to turn on Self Switch A for this event.
- this._mapId : the map ID this event is on
- this.eventId() : the function that returns the ID of this event
- A : Self Switch A
- true : Turns the switch ON (use false to turn it OFF)

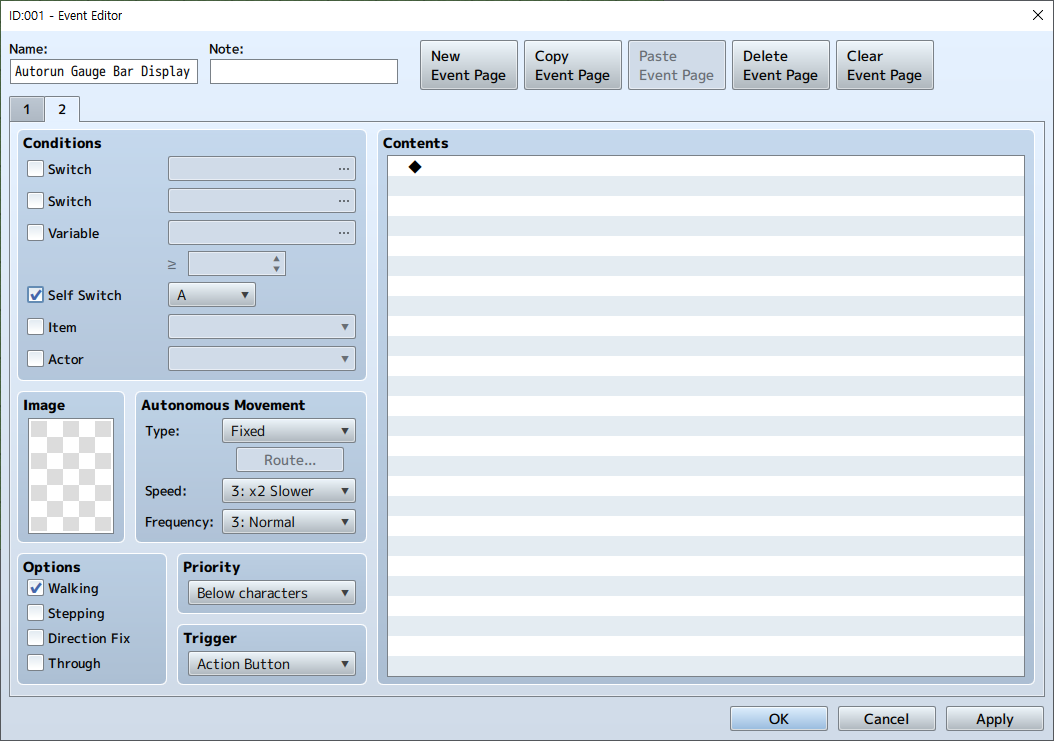
- Click New Event Page to create a second page for the event.
- In Conditions, check on Self Switch and select ‘A’
- Leave the Contents section completely empty.
When the self switch turns on, the event switches to this new page and stops functioning.

3. Creating a Common Event: Gauge Bar Real-Time Operation
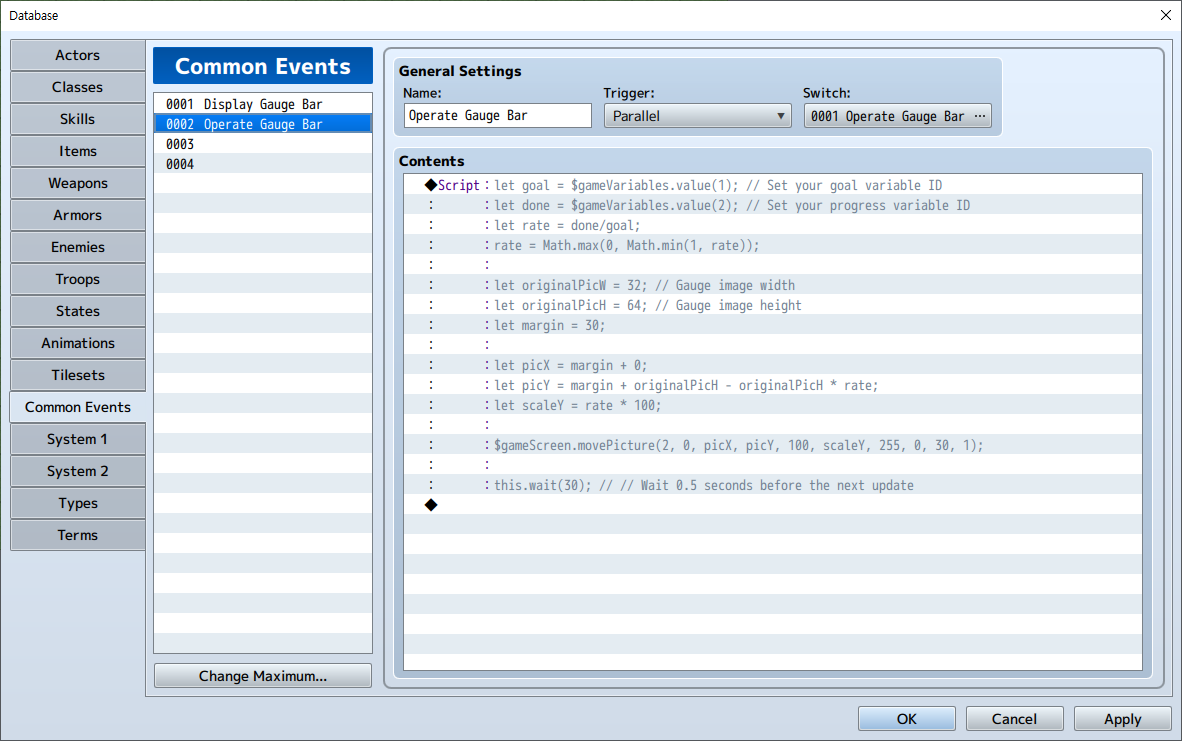
Now it’s time to create a new common event that makes the on-screen gauge bar update in real time.
This way, the event will run continuously in the background only when the switch is ON.
- Insert the same code we used last time to make the gauge bar move according to the rate.
- Then, there’s one important line we need to add.
At the end, make sure to add a wait command.
Without it, the script will run every frame, which can cause lag.
In this.wait(n), n represents the number of frames to wait.
For example:
- this.wait(60) → waits for 1 second
- this.wait(30) → waits for 0.5 seconds

When you use a fixed number for goal, it works fine — but if you use a variable, it doesn’t work.
The reason it doesn’t work when using let goal = $gameVariables.value(n1); is usually because the variable n1 hasn’t been set yet or its value is still 0. In the linerate = done / goal;, if goal is 0 or undefined, the result becomes NaN or Infinity, which breaks the rest of the calculation. That’s why you need to make sure the variable for goal is properly set before turning on the switch that runs this parallel common event. Otherwise, it won’t work correctly.
Summary of the Full Flow: Displaying a Real-Time Gauge Bar in RPG Maker MZ
- 1
Create a Common Event to Show the Gauge Images
- 2Create a Map Event to Run the Common Event Once (Autorun, Self Switch)
- 3Create a Common Event for Real-Time Gauge Updates (Parallel+wait)
